Opening
With Azure SQL Database constantly improving over the years, more and more options and configurations became available. In the beginning, the main way to connect to an Azure SQL Database was through a public endpoint. These days, more secure options exist, making use of things like Private Link, VPN Gateways, local and global VNET peerings, and that’s just for the people who don’t want to spend a fortune on Express Route.
There are several benefits to connecting to an Azure SQL Database with a private endpoint over a public endpoint:
Improved security: Private endpoints allow you to connect to your database from inside your virtual network without exposing it to the public internet. This reduces the risk of attacks and data breaches.
Reduced latency: Private endpoints use a direct connection between your virtual network and Azure SQL Database, which can reduce latency and improve performance.
Increased control: Private endpoints give you more control over network access to your database. You can restrict access to specific subnets within your virtual network, or even to specific applications.
Compliance: Private endpoints can help you meet compliance requirements that require you to keep your data private.
Let’s look at some examples of how to configure connectivity to Azure SQL Database, ordered from least secure to most secure:
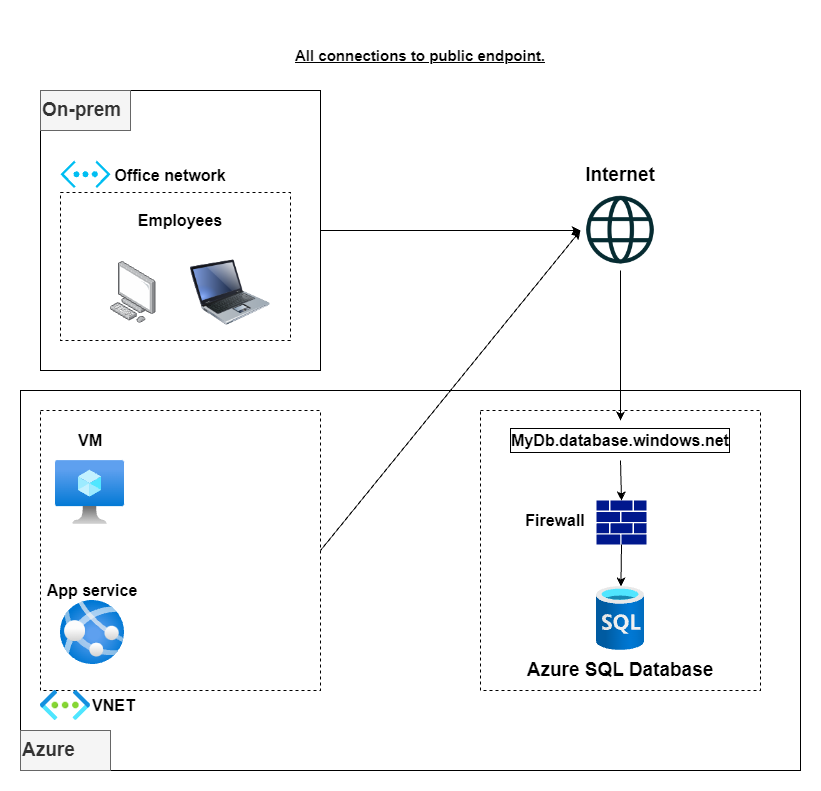
- Allow all connections over the public endpoint: By adding a firewall rule to allow the port range 0.0.0.0-255.255.255.255, you enable anybody with an internet connection and credentials to connect to your Azure SQL Database. Before you say this is crazy, I saw it implemented by a client in production.
- Allow all Azure connections and your office network public IP address over the public endpoint: When creating a new Azure SQL Database, you are presented with the option to enable traffic from Azure resources with a simple checkbox. In the past, this was the easiest way (if not the only way) to allow traffic from your Azure-hosted applications. The caveat with this option is that all Azure resources (not necessarily yours) can access your database if they get a hold of some credentials.
- Allow selected Azure connections and your office network public IP address over the public endpoint: This option can be implemented by adding firewall rules to allow connections only from your IP addresses. While this is a more secure option, the drawback comes from the fact that you can’t have any resource with a dynamically allocated IP address.
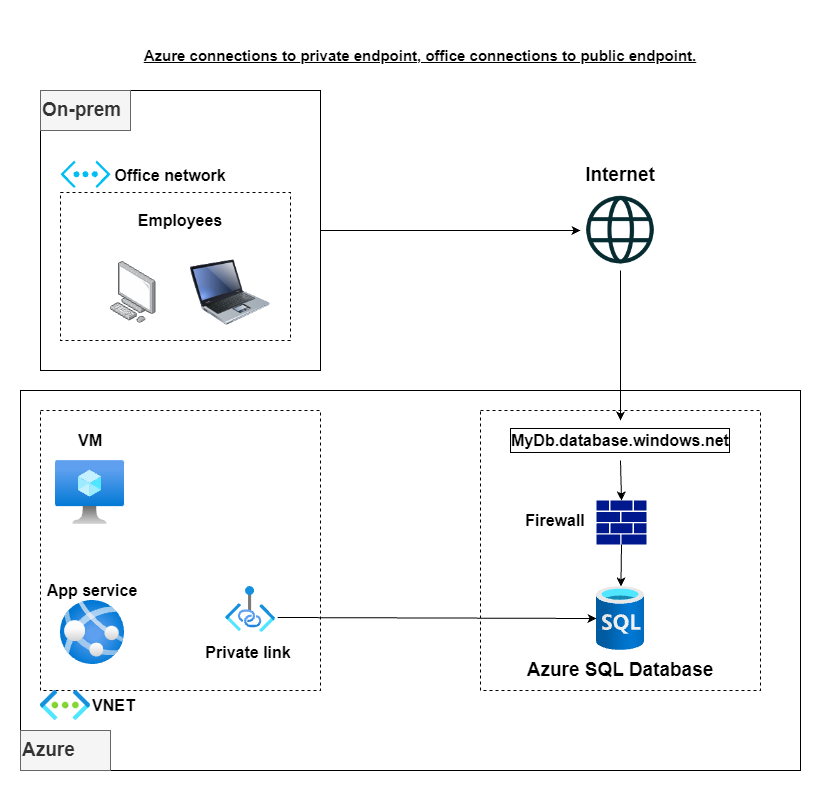
- Allow selected Azure connections over a private endpoint and your office network public IP address over the public endpoint: This option can be implemented by creating a Private Link between your VNET and your Azure SQL Database. All resources with IP addresses in the VNET (or in peered VNETs) will be able to access the database. The advantage is that traffic flows on Azure’s backbone network rather than through the Internet.
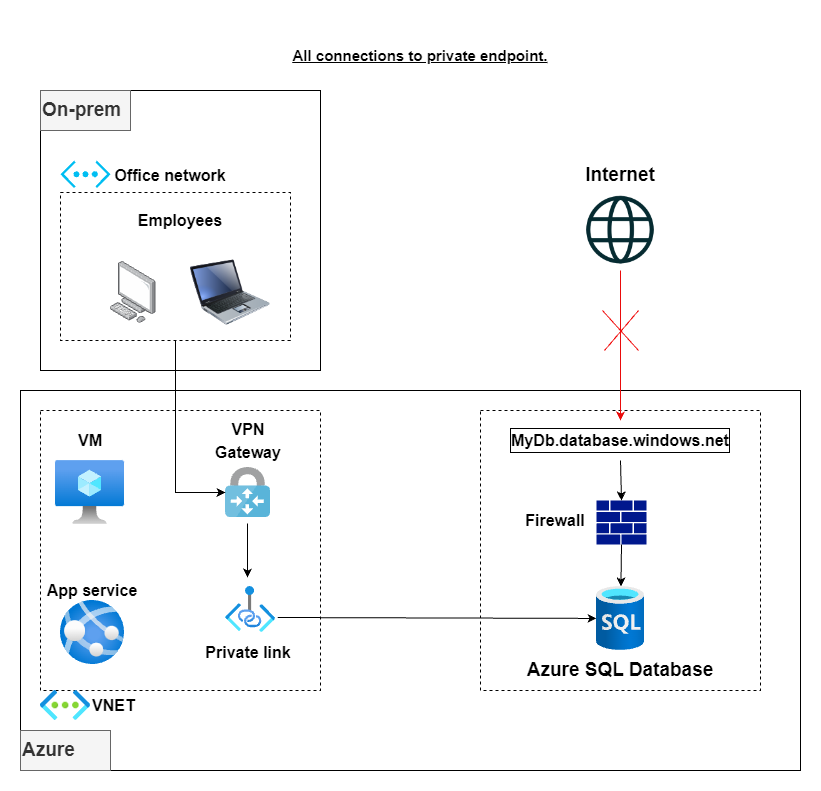
- Allow selected Azure connections over a private endpoint with a jump box VM: Building on the previous option, we also get employees to connect privately by creating an additional VNET, a jump box VM with a static IP inside the VNET range. This VM will be used by employees as a jump box to connect to your Azure SQL Database. While this might not be ideal for everybody, it does have the advantage of making all connections to the database private without requiring dedicated VPN hardware.
- Allow selected Azure connections over a private endpoint with a VPN Gateway: This option is similar to the previous one, but instead of a jump box VM, we need to create a VPN Gateway in the secondary VNET and connect our on-premise network to it. It is a secure and pragmatic solution, but it requires investment in dedicated hardware and a network professional to set it up.
Some of the above architectures are visually explained in the following diagrams:

 Middlegame
In this blog post, I will give you a step-by-step guide on how to configure private connections to Azure SQL Database for your Azure-hosted resources while allowing your office network to connect to the public endpoint.
The demo environment for this guide will have the following resources:
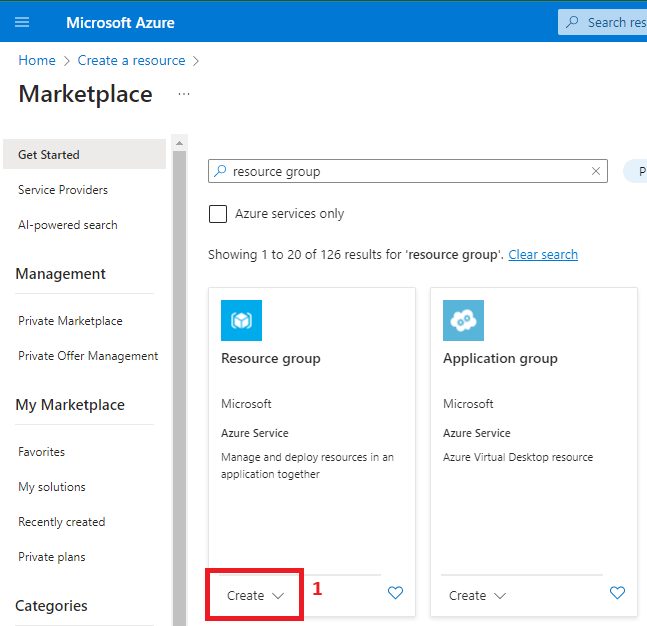
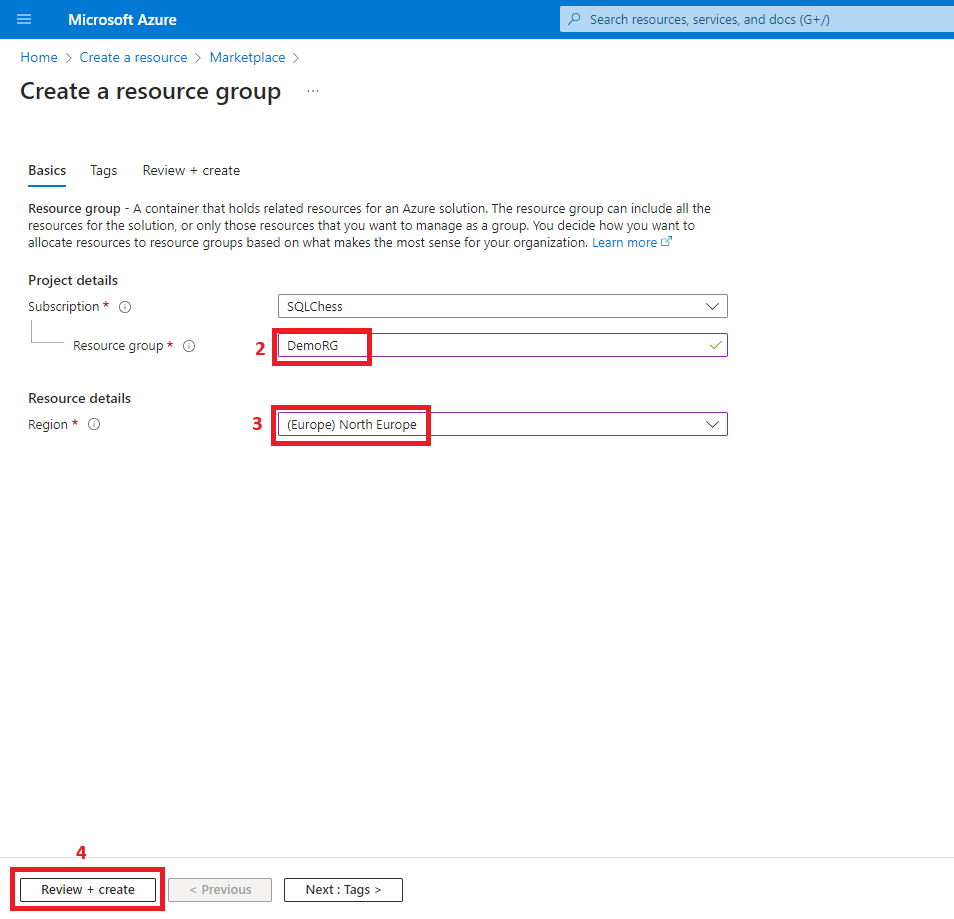
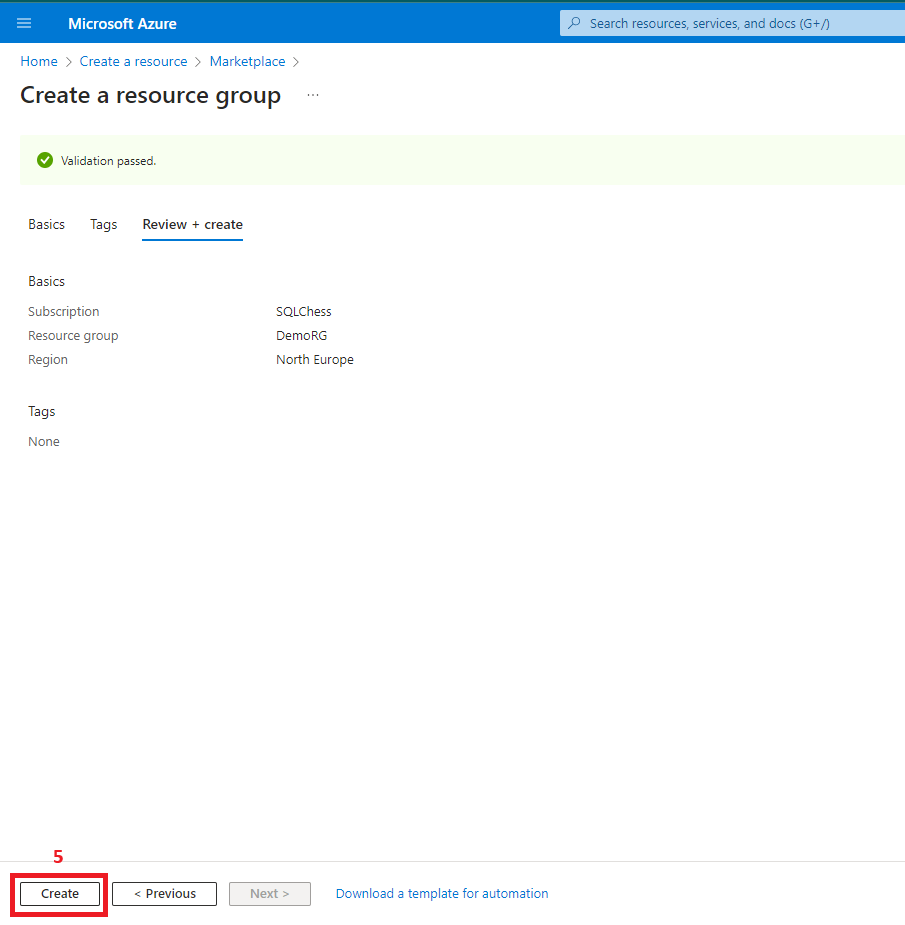
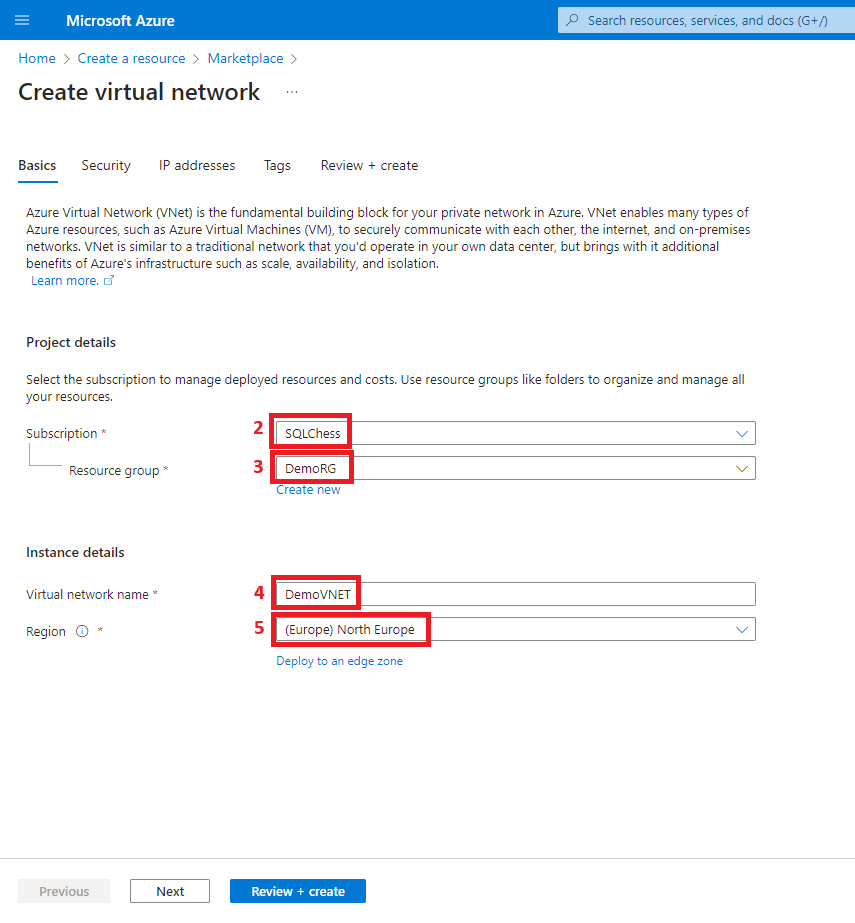
- Resource group (DemoRG) where all Azure resources will be deployed
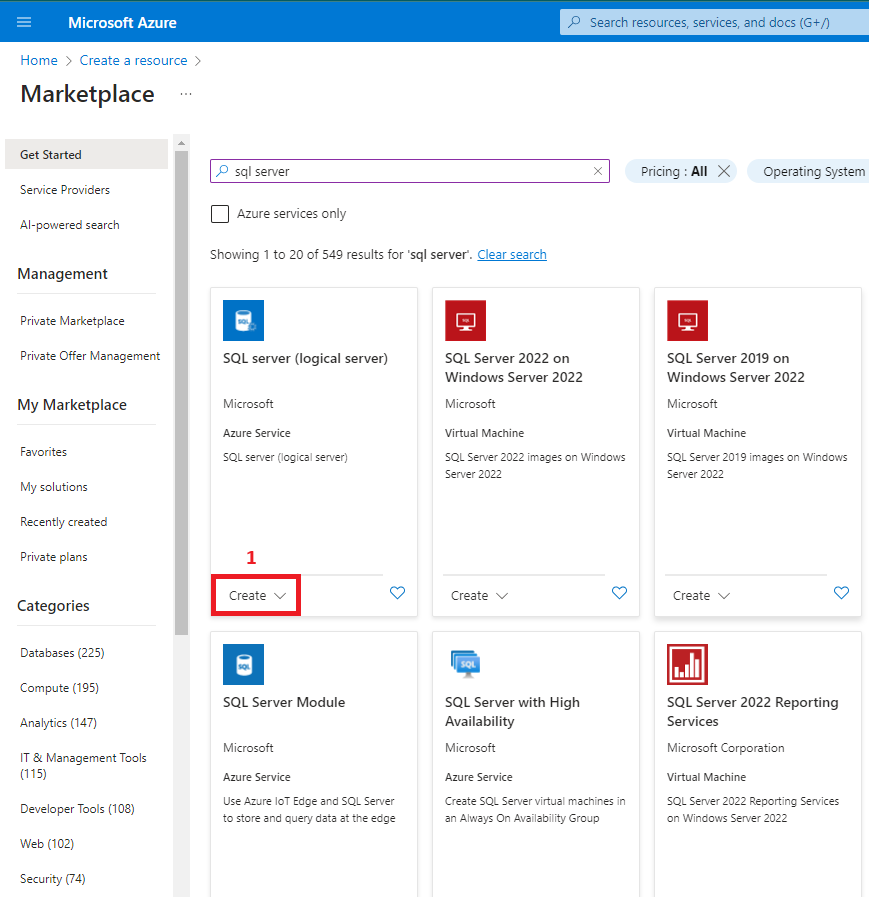
- Azure SQL Database (DemoDb)
- Virtual Network (DemoVNET)
- Private Link (DemoPL) to connect the virtual network to the Azure SQL Database
- VM (DemoVM) with a static IP address inside DemoVNET to test connectivity.
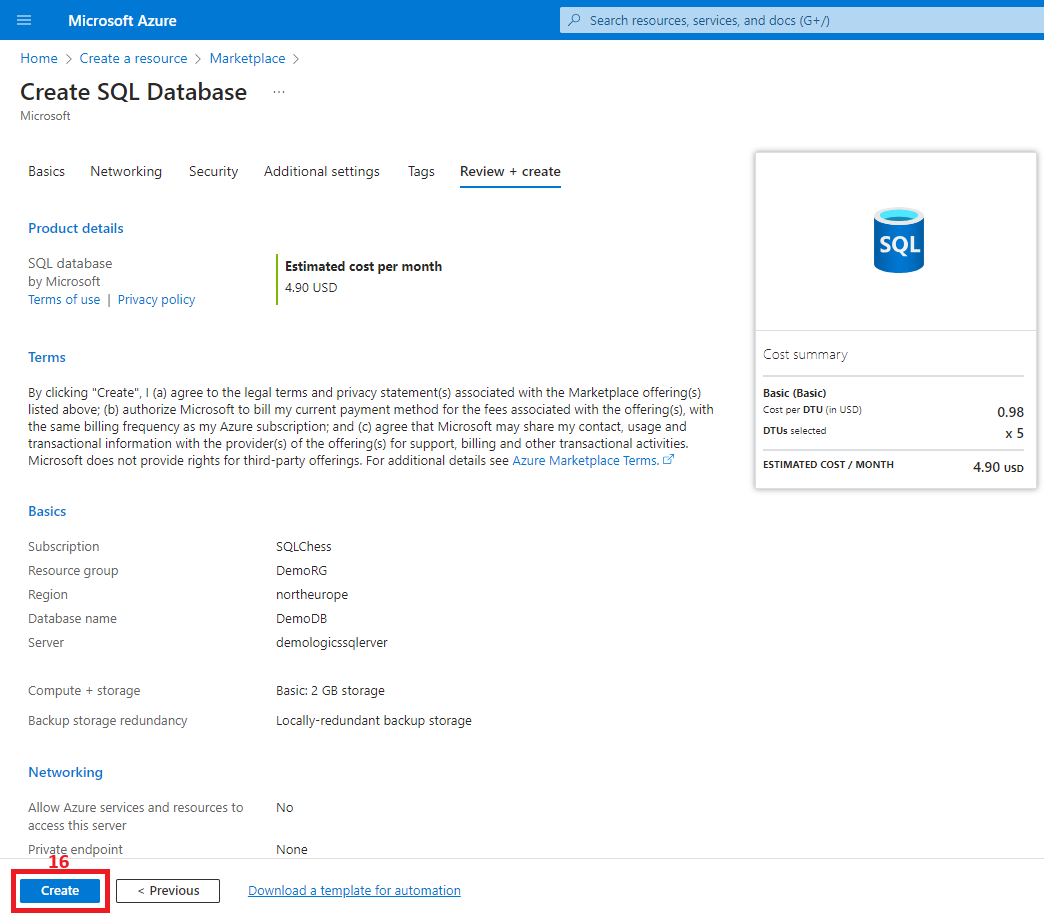
1. Create the resource group
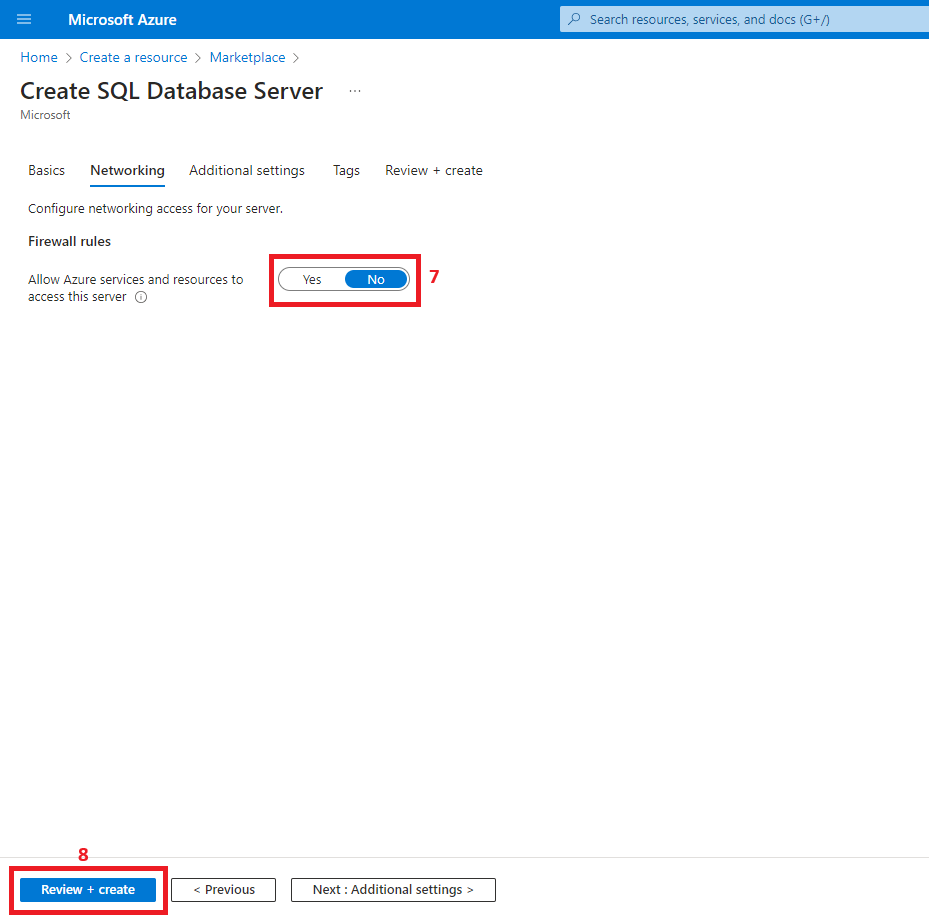
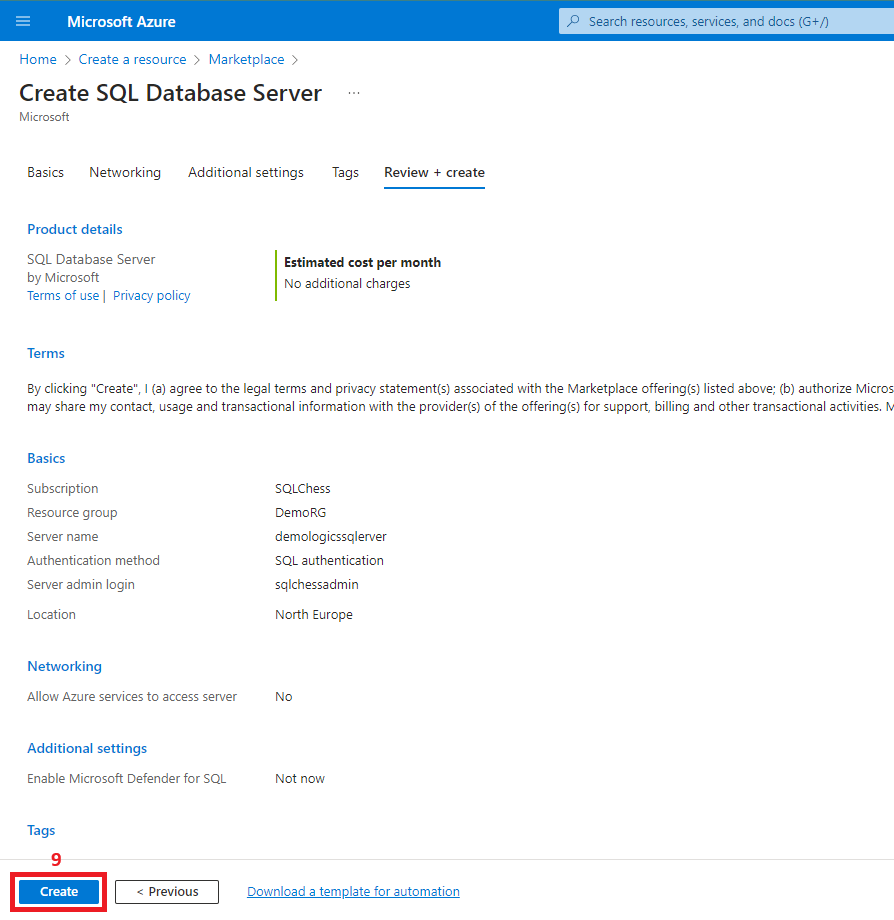
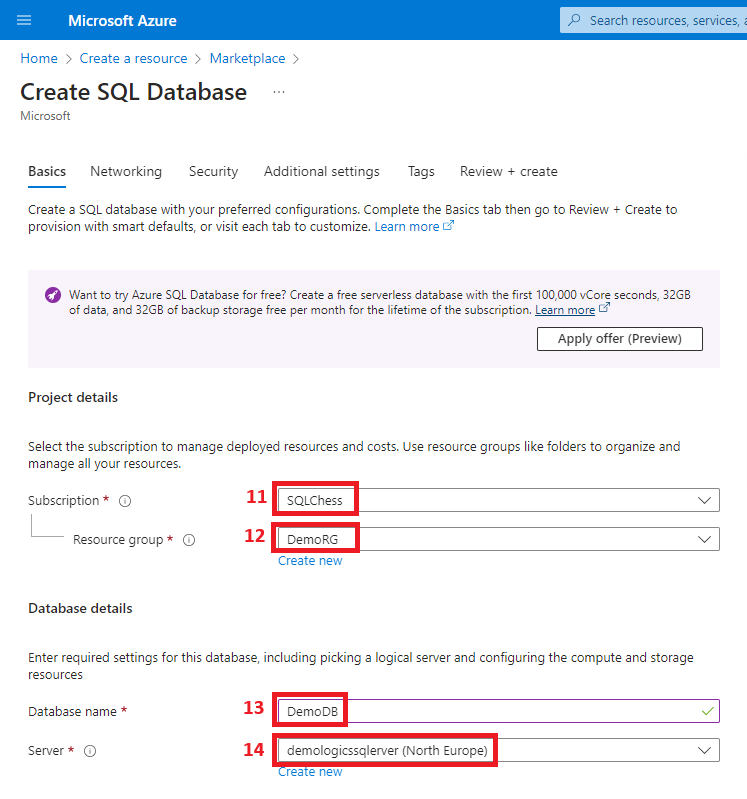
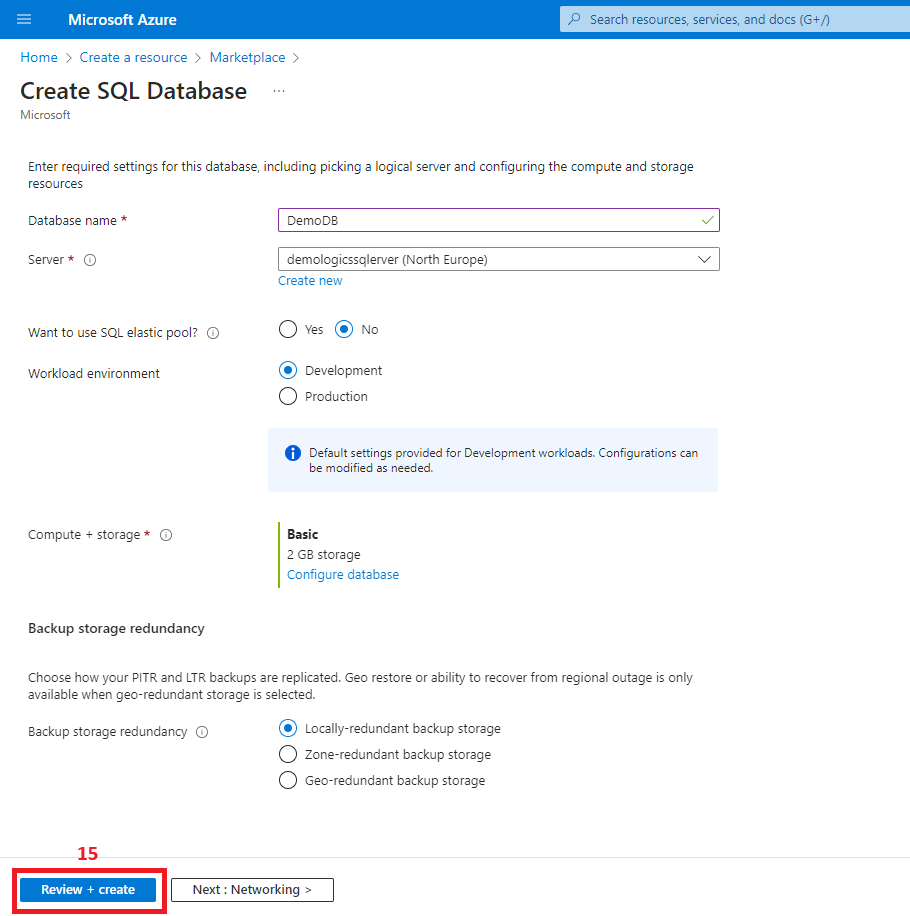
2. Create the Azure SQL Database


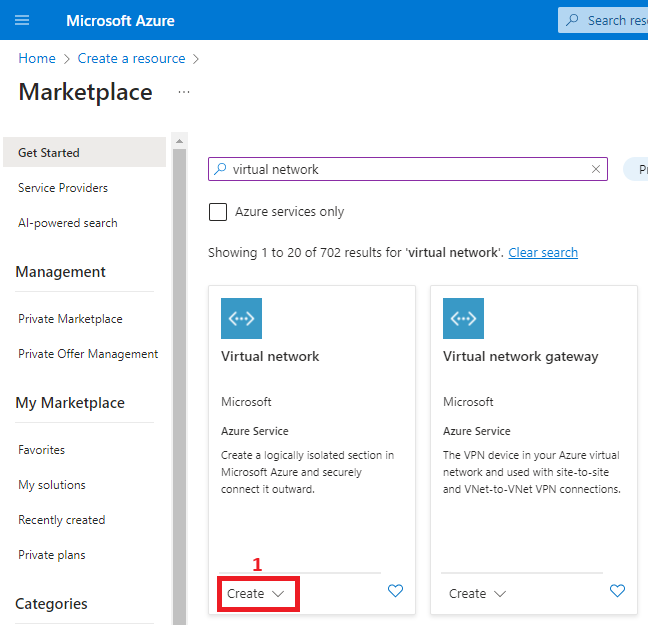
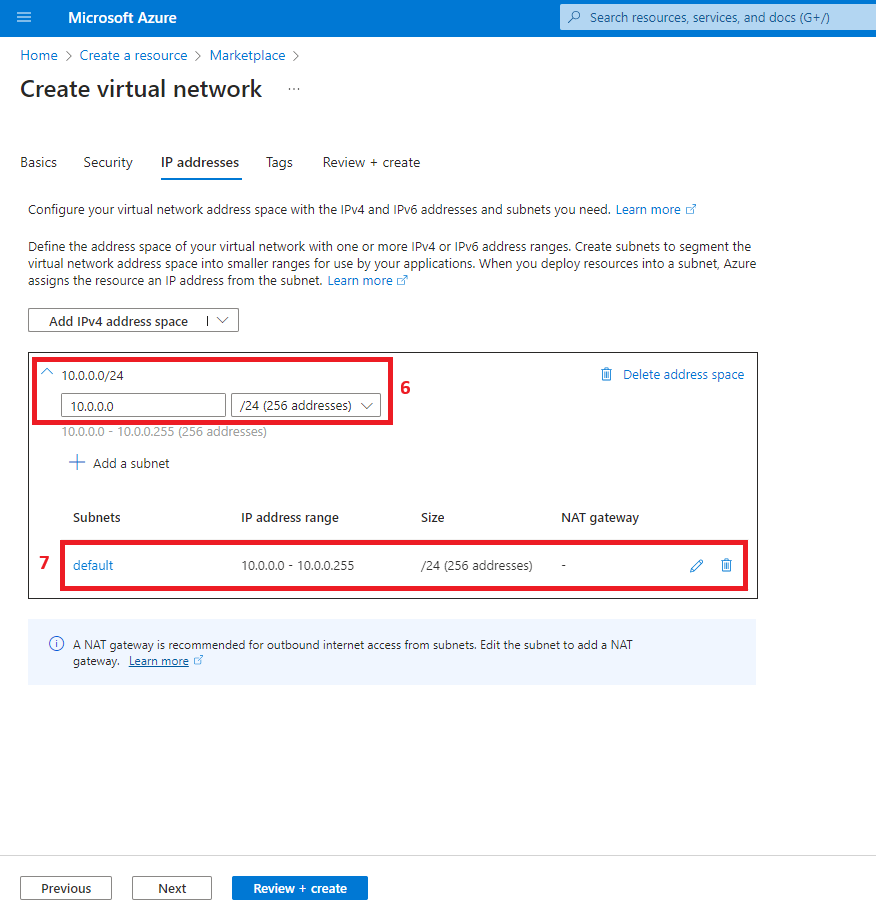
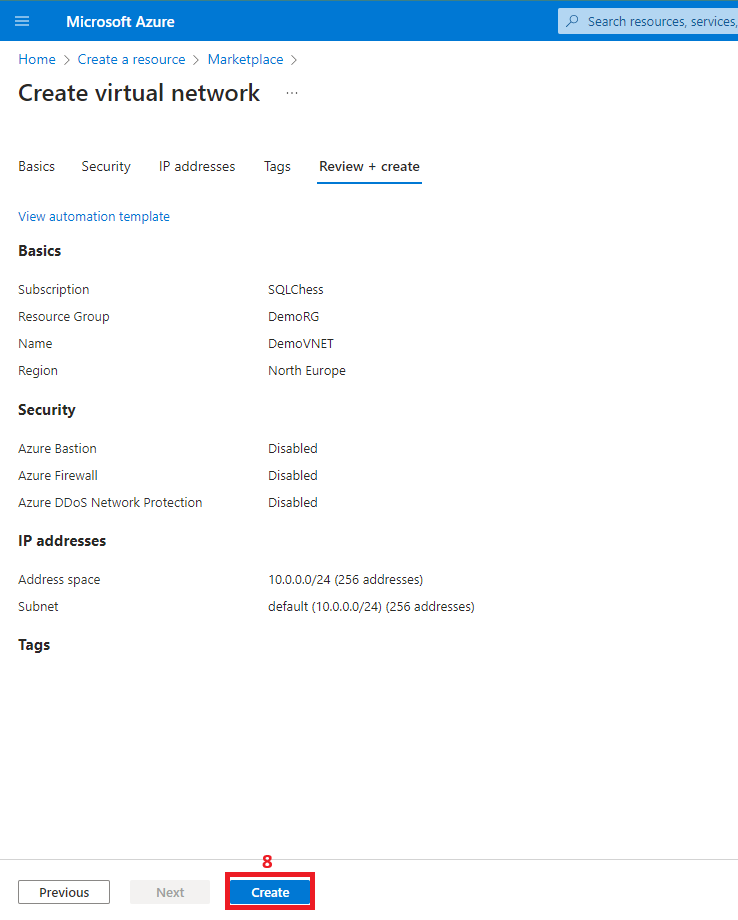
3. Create a virtual network
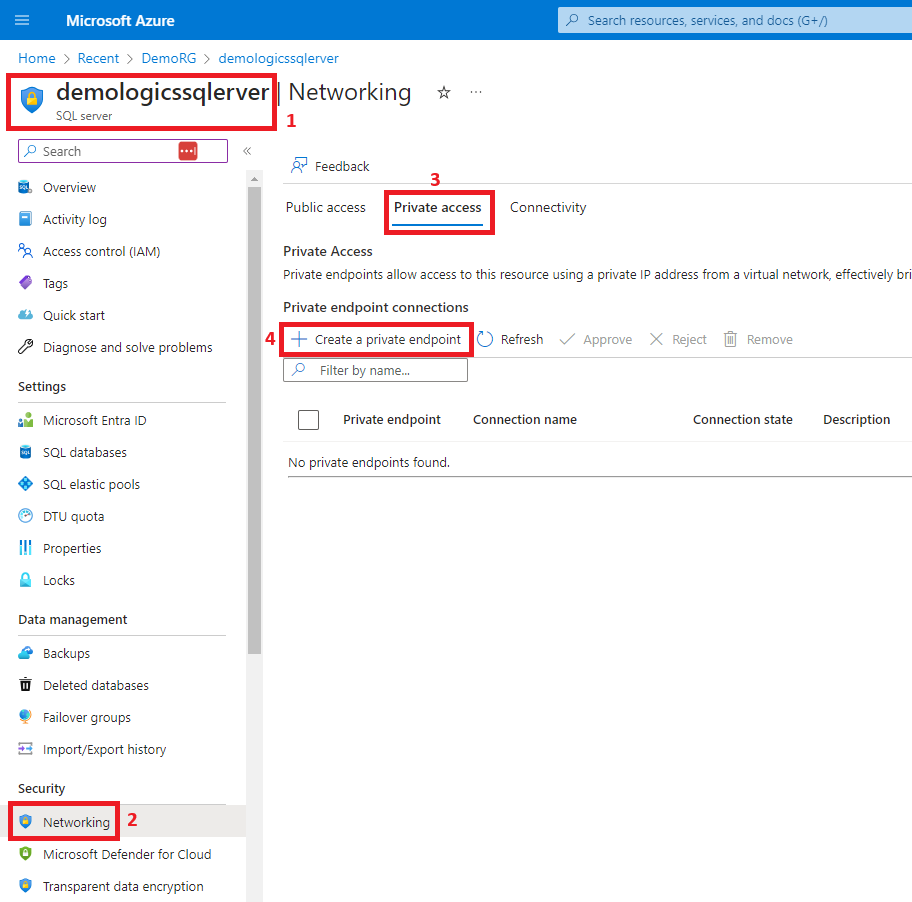
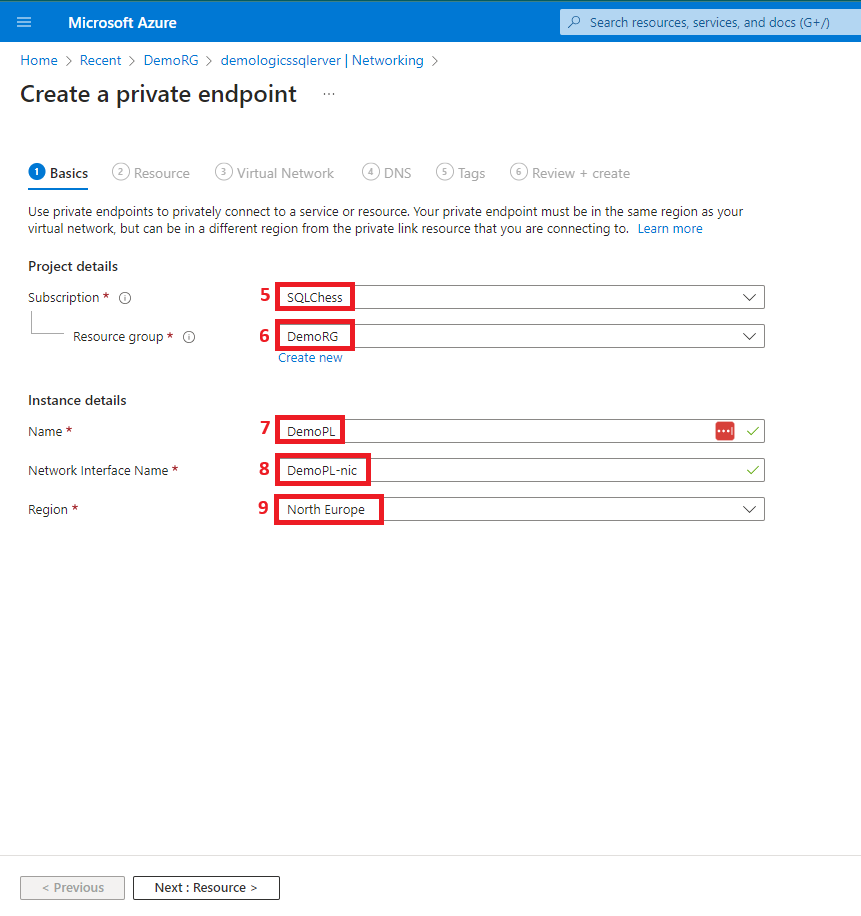
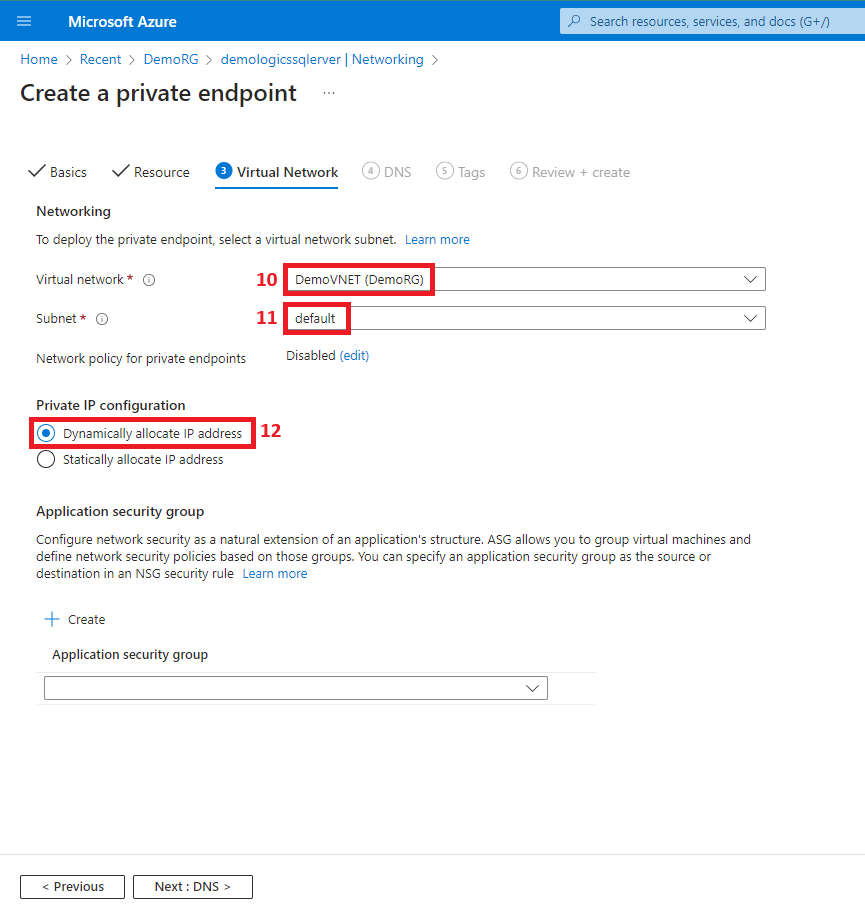
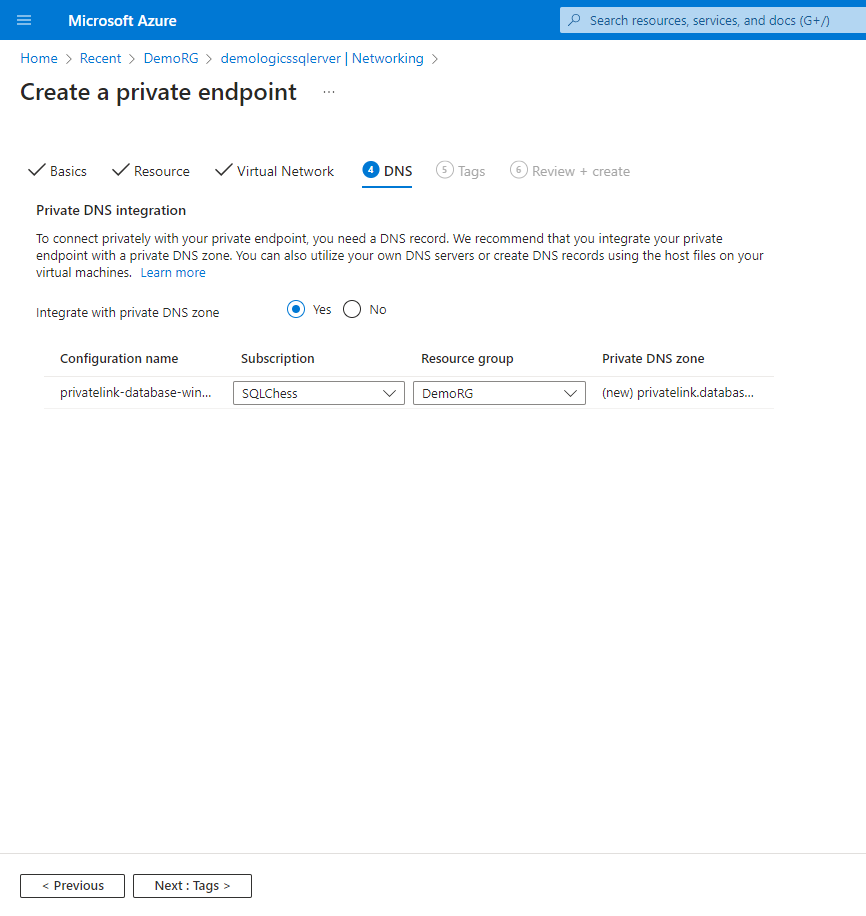
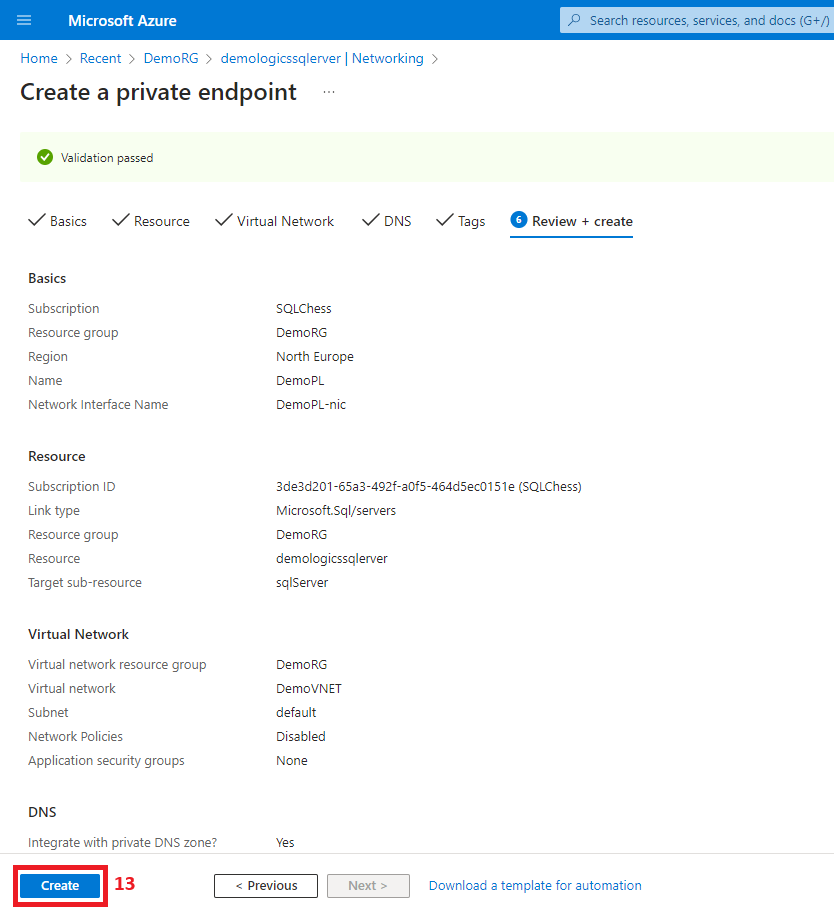
4. Create the private link
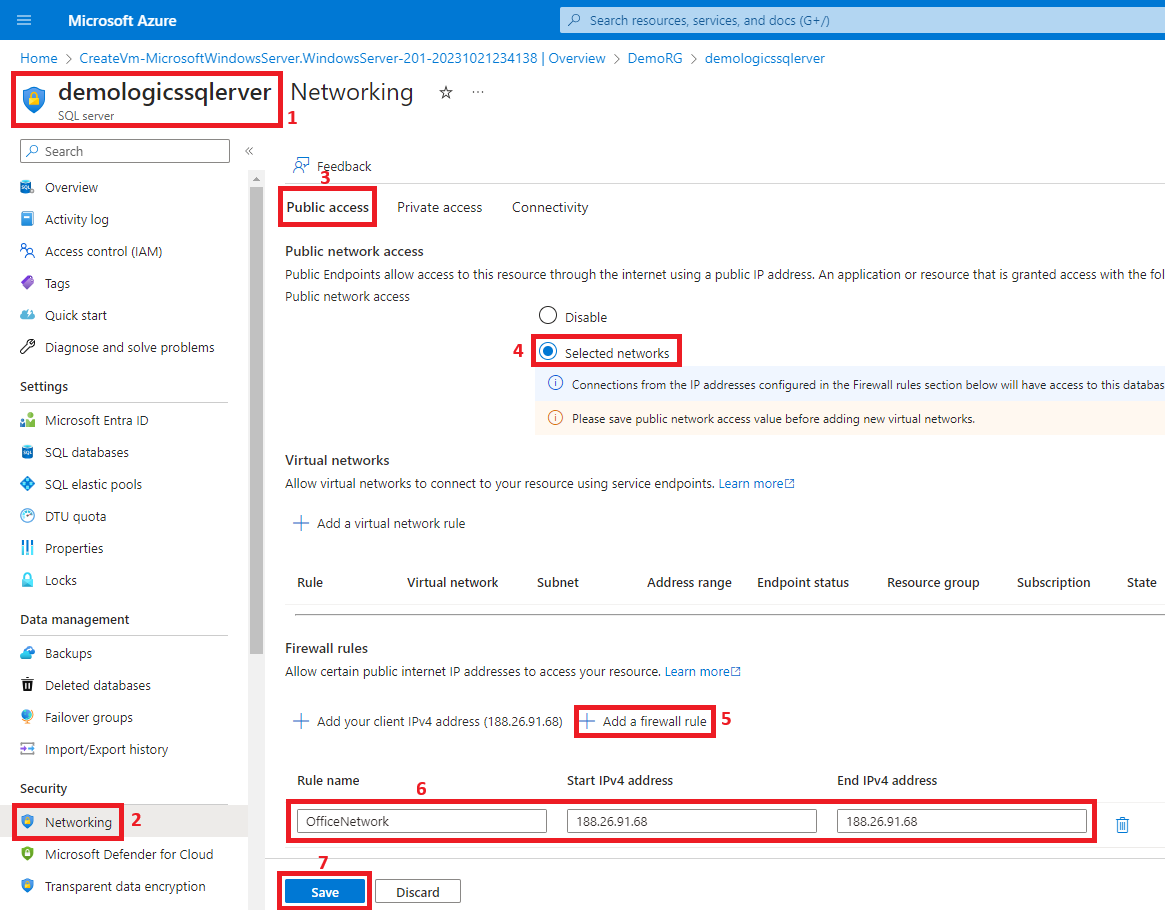
5. Enable public access from the office network
 Endgame
To test this setup, we’ll use nslookup to compare a connection from the office network and a connection from the virtual network.
Office network:
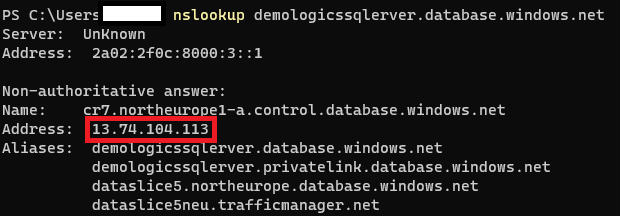
Virtual network:
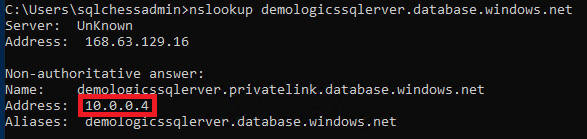
We notice a difference between the IP addresses returned by executing nslookup on our Azure SQL Database DNS name. On the office network we get a public IP address (13.74.104.113), while in the virtual network we get the same IP address we allocated to the private link (10.0.0.4).


Useful links: